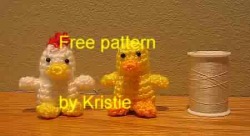
The birds and the bee's
 Birds and the Bee’s
Supplies: Small amounts of WW yarn F Hook Small scrap of felt for bird beak Small buttons for bird eyes (optional) Google eyes for bee’s (optional) Small piece of chenille stem (pipe cleaner) for bee antenna
Terms used Sc = single crochet Sc-dec = single crochet decrease over 2 stitches Ch = chain FO = Finish off, or Fasten off Slp st = slip stitch BLO = Back Loops Only
All pieces are done in one continous spiral. Use stitch marker to count rows.
The Birds...... For solid color bird, ignore color changes.
Bird body
Starting at top of bird body, With Orange, Ch 2 1) 5 sc in 2nd ch from hook 2) 2 sc in each sc around (10 sc) 3) (2 sc in first sc, sc in next sc) repeat around (15 sc) 4) (2 sc in first sc, sc in next 2 sc) repeat around (20 sc) 5-7) sc in each sc around, Change to green yarn. 8) (2 sc in first sc, sc in next 4 sc) repeat around (24 sc) 9) sc in each sc around 10) (2 sc in first sc, sc in next 5 sc) repeat around. (28 sC) Change to pink yarn. 11-12) sc in each sc around 13) (sc-dec, sc in next 5 sc) repeat around (24 sc) 14) (sc-dec, sc in next 4 sc) repeat around (20 sc) 15) In BLO, (sc-dec, sc in next 2 sc) repeat around (15 sc) Stuff bird. For bird that sits up better, stuff top half of bird with fiberfill, and bottom of bird with polypellets. 16) (sc-dec, sc in next sc) repeat around (10 sc) 17) sc-dec around (5 sc) FO leaving long tail. Use tail to close hole in bottom of bird.
Wings
Wing front (make 2)
With blue, Ch 2, 1) 5 sc in 2nd ch from hook 2) 2 sc in each sc around (10 sc) 3) (2 sc in first sc, sc in next sc) repeat around (15 sc) Slp stch to next sc, FO leaving long tail for sewing.
Wing back (make 2)
With light pink, Ch 2, 1) 5 sc in 2nd ch from hook 2) 2 sc in each sc around (10 sc) 3) (2 sc in first sc, sc in next sc) repeat around (15 sc) 4) (2 sc in first sc, sc in next 2 sc) repeat around (20 sc) If you want a contrast color on wing edge, change colors now 5) (2 sc in first sc, sc in next 3 sc) repeat around (25 sc) Slp stch to next sc, FO leaving long tail for sewing Fold wing back in half. Sew one corner to side of bird, leaving opposite side unsewn. Sew wing over front half of wing back. (you will be sewing the wing front OVER wing back that has been sewn on already.)
Tail
With blue, Ch 2, 1) 6 sc in 2nd ch from hook 2) 2 sc in each sc around. (12 sc) 3-5) sc in each sc around Slp stch to next sc, FO leaving long tail for sewing Stuff tail VERY lightly and sew to back of bird.
Embroider eyes on bird. For beak, cut a small diamond shape from scrap felt. Fold in half Sew or glue down fold to bird.
Enjoy your bird!
...And the Bees!
Bee body
With yellow, Ch 2, 1) 6 sc in 2nd ch from hook 2) 2 sc in each sc around. (12 sc) 3) (2 sc in first sc, sc in next sc) repeat around (18 sc) 4) sc in each sc around Change to black 5-6) sc in each sc around Change to yellow 7-8) sc in each sc around Change to black. 9) (sc-dec, sc in next sc) repeat around (12 sc) 10) sc in each sc around Stuff 11) sc-dec around (6 sc) 12) sc-dec around as best you can (3 sc) Do NOT finish off Ch 2 FO, leaving long tail. Weave tail back through ch 2 (the stinger). Use tail to close the hold from round 12 also. Weave in any ends
Head
With black, Ch 2, 1) 6 sc in 2nd ch from hook 2) 2 sc in each sc around. (12 sc) 3) sc in each sc around Slp stch to next sc, FO leaving long tail for sewing Stuff lightly and sew head to body.
Wings (make 2)
With White, Ch 3 1) 2 sc in 2nd ch from hook, 3 sc in last ch. Working on opposite side of chain, sc in last sc. (this is also the first ch you 2 sc’d in) (6 sc) 2) 2 sc in each sc around (12 sc) Slp stch to next sc, FO leaving long tail for sewing
Sew each wing end to middle of bee’s back. Glue on wiggle eyes. Take a 2 inch piece of black chinelle stem. (pipe cleaner) push stem through center of bee head. Secure with a dot of glue if desired. Bend antenna ends forward near top. Bee complete!
Claude the 2 humped Camel
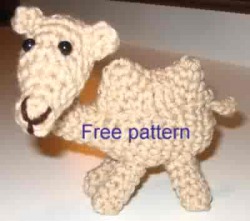
 Claude the 2 Humped Camel
Supplies needed: G Hook Small amounts of WW yarn Buttons for eyes (optional) Fiberfill 1 pipe cleaner
Terms used Sc = single crochet Sc-dec = single crochet decrease over 2 stitches Dc= double crochet Trc= Triple crochet Ch = chain BLO= Back loops only Slp stch= slip stitch FO = Finish off, or Fasten off
Body and neck Each round is joined with a slp st to first stitch made in that row Ch 2, 1) 6 sc in 2nd chain from hook, 2) ch 1, 2 sc in each sc around (12 sc) 3) ch 1, (2 sc in first sc, sc in next sc) repeat around (18 sc) 4-10) ch 1, sc in each sc around 11) ch 1, (sc-dec, sc in next sc) (12 sc) STUFF 12) ch 1, (sc-dec, sc in next sc) (8 sc) Body is not complete..DO NOT finish off, moving onto neck, STUFF as you go. 13-20) ch 1, sc in each sc around. FO leaving longer tail for sewing.
Head Each round is joined with a slp st to first stitch made in that row Ch 2 1) 6 sc in 2nd chain from hook 2) ch 1, sc in each sc around 3) ch 1, sc in first 2 sc, 2 sc in each of next 3 sc, sc in last sc (9 sc) 4) ch 1, (2 sc in first sc, sc in next sc) repeat 3 MORE times, sc in last sc (13sc) 5-9) ch 1, sc in each sc around It is easiest if you emboider nose now, 10) ch 1, (sc-dec, sc in next sc) repeat 3 MORE times, sc in last sc. (9 sc) STUFF, sew or emboider eyes is easiest if done here. 11) ch 1, sc-dec around, end with sc in last sc FO
Use tail to sew hole shut. Fold pipe cleaner in half. Push folded pipe cleaner up neck of camel and into body, leaving about ½ inch sticking out. Place head on end of neck, pushing remaining pipe cleaner into head. Make sure seam side of head is used as the bottom of head. Trim pipe cleaner if necessary. Sew head to neck.
Ears (make 2) Ears are done in continous spiral, do not join at round end Ch 2 1) 5 sc in 2nd ch from hook 2) sc in each sc around Slp st to next sc, FO
Sew ears towards back of head. Sew or emboider eyes on head
First hump Rows are done in continous spiral, do not join at round end Ch 2 1) 6 sc in 2nd chain from hook 2) (2 sc in first sc, sc in next sc) repeat around (9 sc) 3) (2 sc in first sc, sc in next 2 sc) repeat around (12 sc) Slp st to next sc FO
Second hump: Repeat directions for first hump EXCEPT do not slp st to next sc at end of round 3..instead, 4) sc in first 4 sc, dc in next sc, trc in next sc, now, take first hump made,(NO NOT fasten off!) and trc in any sc on first hump, Wornking on first hump dc in next sc, sc in next 8 sc, dc in next sc, trc in next sc, Working now on second hump, trc in first unused sc on second hump (this will be the first one immediately after the trc made before joining the first hump), dc in next sc, sc in last 4 sc. Slp stch to next sc FO leaving LONG tail.
Sew hump to camel body, stuffing slightly under the hump if desired.
Feet (make 4) Feet are made in one continous spiral, do not join round ends A stich marker may be helpful here. Chain 2, 1) 6 sc in 2nd chain from hook 2) IN BACK LOOPS ONLY. ch 1, sc in each sc around 3-6) sc in each sc around. FO leaving longer tail for sewing.
Stuff legs if desired. (I didn’t do this to mine, and it still stands up!) Sew legs to camel
Tail Ch 6 1) slp stch in 2nd chain from hook, slp stch in next 2 chs, sc in last 2 chs. FO Sew tail to camel. Bend Camels neck as desired. Enjoy!
This is your new blog post. Click here and start typing, or drag in elements from the top bar.
Itty Bittys
 Snail
Shell At the end of each round, join with a slip stitch to beginning sc. Chain 2, (starting at top of bug body) 1) 5 sc in 2nd chain from hook 2) ch 1, 2 sc in each sc around (10 sc) 3) ch 1, (2 sc in first sc, sc in next sc) repeat around (15 sc) 4) ch 1, (2 sc in first sc, sc in next 2 sc) repeat around (20 sc) 5-7) ch 1, sc in each sc around.. DO NOT FINISH OFF... Embroider the shell swirl now. See picture for help. 8) In BLO, ch 1, sc-dec around (10 sc) STUFF 9) ch 1, sc-dec around (5 sc) FO leaving long tail. Use tail to sew hole shut on bottom Weave in ends
Head At the end of each round, join with a slip stitch to beginning sc. Ch 2 1) 5 sc in 2nd chain from hook 2) ch 1, 2 sc in each sc around (10 sc) 3) ch 1, sc in each sc around 4) ch 1, (sc-dec, sc in next sc) repeat around to last sc, sc in last sc (7 sc) 5) ch 1, sc-dec around to last sc, sc in last sc (5 sc) FO leaving long tail
Body
The rounds are not joined. The body is done in one continous spiral Starting at tail and working up, Ch 2 1) 4 sc in 2nd chain from hook 2-3) sc in each sc around 4) (2 sc in first sc, sc in next sc) repeat (6 sc) 5) (2 sc in first sc, sc in next 2 sc) repeat (8 sc) 6-11) sc in each sc around 12) sc dec around (4 sc) Slip stitch to next sc FO leaving LONG tail.
Sew body to snail shell. Leave a bit of the tail sticking out behind shell. Body goes under shell, and come about half way up shell front. Sew head to snail where body stops.
Eyes Join yarn with slip stitch where you want one eye to be. Using both strands of yarn (from starting tail too) chain 2. FO and knot ends. Snip down Glue google eyes on top of eyes Viola!
Tiny Turtle
General supplies WW yarn, F hook Fiberfill Google eyes
Top shell is done in one continous spiral, you do not join rounds at the end Chain 2, (starting at top of bug body) 1) 5 sc in 2nd chain from hook 2) 2 sc in each sc around (10 sc) 3) (2 sc in first sc, sc in next sc) repeat around (15 sc) 4) (2 sc in first sc, sc in next 2 sc) repeat around (20 sc) 5) (2 sc in first sc, sc in next 3 sc) repeat around (25 sc) 6) sc in each sc around FO leaving very long tail for sewing. Decorate shell if desired.
Head
Head is done in one continous spiral, you do not join rounds at the end Ch 2, 1) 4 sc in 2nd chain from hook 2) 2 sc in each sc around. 3) (2 sc in first sc, sc in next sc) repeat around (12 sc) 4) sc in each sc around 5) (sc-dec, sc in next sc) repeat around (8 sc) 6-7) sc in each sc around FO
Arms and legs (make 4)
Join each row end with a slip stitch to the first sc made. Ch 3 1) 2 sc in 2nd chain from hook, 3 sc in last ch, working along underside, sc in next sc, (this is the first chain you sc'd in) join with slip stitch to first sc made. (6 sc) 2-4) ch 1, sc in each sc around. Join with slip stitch to first sc of row. FO
Tail
Chain 3 1) sc in 2nd chain from hook, sc in last chain. Chain 1, turn. (2 sc) 2) sc in each sc across, ch 1, turn 3) sc-dec. ch 1, turn. (1 sc) 4) sc in sc. FO
Bottom Shell
Done in one continous spiral, round ends are not joined. Chain 2 1) 5 sc in 2nd chain from hook 2) 2 sc in each sc (10 sc) 3) (2 sc in first sc, sc in next sc) repeat around (15 sc) 4) (2 sc in first sc, sc in next 2 sc) repeat around (20 sc) 5) (2 sc in first sc, sc in next 3 sc) repeat around (25 sc) Slip stitch to next sc, FO
This is the tricky part. I found it easiest if I pinned the turtle together minus the tail before sewing. Starting at one of back legs, sew turtle together going from back leg, to front leg, to head, to other front leg, to last back leg. Stop here to stuff, pin tail into place and sew turtle shut. Glue or sew on eyes. Tiny turtle complete!
Little Ladybug
General supplies: Size F Crochet Hook Small amounts of ww yarn Tapestry needle for sewing Fiberfill Google eyes Black pipe cleaner for antennas
General terms Sc-dec= single crochet decrease (decrease over 2 stitches) Sc= single crochet FO= finish off BLO= Back loops only
Body
At the end of each round, join with a slip stitch to beginning sc. With red, Chain 2, (starting at top of bug body) 1) 5 sc in 2nd chain from hook 2) ch 1, 2 sc in each sc around (10 sc) 3) ch 1, (2 sc in first sc, sc in next sc) repeat around (15 sc) 4) ch 1, (2 sc in first sc, sc in next 2 sc) repeat around (20 sc) 5-7) ch 1, sc in each sc around.. DO NOT FINISH OFF... Embroider spots now. With black yarn, embroider small X's on bug body. Resuming with red yarn,. 8) In BLO, ch 1, sc-dec around (10 sc) STUFF 9) ch 1, sc-dec around (5 sc) FO leaving long tail. Use tail to sew hole shut on bottom Weave in ends
Head With black Chain 2 1) 5 sc in 2nd chain from hook 2) ch 1, 2 sc in each sc around (10 sc) 3) ch 1, sc in each sc around FO leaving long tail. Sew head to body.
Antennas Cut a 2½ piece of black pipe cleaner. Push through head and bend up. Trim as desired
Glue on google eyes.
Tiny Duck/chick pattern
 Duck & Chicken
Size F hook WW yarn Sead Beads for eyes (optional) Red floss for chicken head
Both are done exactly the same, the chicken just has red floss on its head.
Head/body
Starting at top of head and working down, Join with slip stitch to beginning row stitch at end of each row: Chain 2 1) 5 sc in 2nd chain from hook 2) ch 1, 2 sc in each sc around (10 sc) 3) ch 1, (2 sc in first sc, sc in next sc) repeat around (15 sc) 4-6) ch 1, sc in each sc around 7) ch 1, (sc dec, sc in next sc) repeat around (10 sc) 8) ch 1, 2 sc in each sc around (20 sc) Stuff head 9-12) ch 1, sc in each sc around 13) ch 1, (sc dec, sc in next 2 sc) repeat around (15 sc) 14) ch 1, (sc dec, sc in next sc) repeat around (10 sc) Stuff 15) ch 1, sc dec around (5 sc) Finish off. Use tail to close hole. Weave in ends.
Wings (make 2)
Work in continous spiral, do not join round ends. Chain 2 1) 6 sc in 2nd chain from hook 2-3) sc in each sc around. Slip stitch to next sc in round. FO leaving long enough tail to sew onto bird.
Beak
Work in continous spiral, do not join round ends. Chain 2 1) 5 sc in 2nd chain from hook 2) sc in each sc around. Slip stitch to next sc in round. FO leaving long enough tail to sew onto bird.
Feet (make 2)
Work in continous spiral, do not join round ends. Chain 2 1) 6 sc in 2nd chain from hook 2-3) sc in each sc around Slip stitch to next sc in round. FO leaving long enough tail to sew onto bird.
When sewing beak, wings, and feet onto bird, be sure to keep seam on body to the back. Sew on or embroider eyes onto bird. For chicken, sew a bit of embroidery floss to the top of the head You are done!
Dragon Fly
 Supplies: Small amount ww yarn for body and wings G hook Fiberfill Tapestry needle for sewing Wiggle eyes (optional) Stitch markers (optional)
Rounds are not joined at the end of each round. It is a continous spiral.
Head and body: Chain 2 1) 6 sc in 2nd chain from hook 2) 2 sc in each sc around 3) (2 sc in first sc, sc in next sc) repeat around (18 sc) 4-6) sc in each sc around 7) (sc dec, sc in next sc) repeat around (12 sc) 8) sc dec around. (6 sc) Stuff head firmly, working on body next 9) (2 sc in first sc, sc in next sc) repeat around (9 sc) 10) (2 sc in first sc, sc in next 2 sc) repeat around (12 sc) 11) (2 sc in first sc, sc in next 3 sc) repeat around (15 sc) 12-20) sc in each sc around. (for longer body, add a few more rows) 21) (sc dec, sc in next 3 sc) repeat around (12 sc) 22) (sc dec, sc in next 2 sc) repeat around (9 sc) Stuff body 23) (sc dec, sc in next sc) repeat around (6 sc) 24) sc dec around End with slp st to next sc. Fasten off. Use tail to close hole, weave in ends
Front wings (make 2)
Chain 2 1) 6 sc in 2nd chain from hook 2) (2 sc in first sc, sc in next sc) repeat around (9 sc) 3) (2 sc in first sc, sc in next 2 sc) repeat around (12 sc) 4-6) sc around 7) (sc dec, sc in next 2 sc) repeat around (9 sc) 8-9) sc around 10) (sc dec, sc in next sc) repeat around (6 sc) 11-12) sc around 13) sc dec around FO leaving a long enough tail to sew wings onto back of bug
Back wings (make 2)
Chain 2 1) 4 sc in 2nd chain from hook 2) (2 sc in first sc, sc in next sc) repeat (6 sc) 3) (2 sc in first sc, sc in next 2 sc) repeat (8 sc) 4-6) sc around 7) (sc dec, sc in next 2 sc) repeat (6 sc) 8-9) sc around 10) (sc dec, sc in next sc) repeat (4 sc) 11-12 sc around FO leaving long enough tail to sew onto back of bug. Sew wings onto bug.
Antenna
With 12’ piece of yarn, make starting loop in middle of yarn piece. Slip stitch in bugs head, where one antenna should go. Chain 4, using BOTH strands of yarn. FO. You can either weave in ends, or tie 2 knots at top of antenna. Glue or sew on eyes. You are done! Enjoy!
This is your new blog post. Click here and start typing, or drag in elements from the top bar. A sheep for Ewe
 Sheep
Supplies needed: G Hook Small amounts of WW yarn Stitch marker or safety pin Buttons for eyes (optional)
Terms used Sc = single crochet Sc-dec = single crochet decrease over 2 stitches Ch = chain FO = Finish off, or Fasten off Slp st = slip stitch BLO = Back Loops Only Dc = double crochet
Body
Each round is joined with a slp st to first stitch made Ch 2 1) 6 sc in 2nd chain from hook. Slp st to first sc made ch 1, turn 2) (sc, dc) in each sc around. Join, ch1, turn (6 sc, 6 dc) 3) (2 sc in first sc, sc in next sc) repeat around join, ch 1, turn (18 sc) 4) (sc,dc, in first sc, sc in next sc, dc in next sc) repeat this around..ch 1, turn, (12 sc, 12 dc) 5) sc in each sc around, join, ch 1, turn 6) (sc in first sc, dc in next sc) repeat around join, ch 1, turn 7) repeat row 5 8) repeat row 6 9) repeat row 5 10) repeat row 6 11) (sc-dec, sc in next 2 sc’s) repeat around, join, ch 1, turn (18 sc) STUFF 12) (sc-dec, dc in next sc) repeat around, join ch 1, turn (6 sc, 6 dc) STUFF a bit more 13) sc-dec across (6 sc) FO No need to close hole.
Head
Head is done in a continous spiral. Ch 2 1) 5 sc in 2nd chain from hook 2) 2 sc in each sc (10 sc) 3) (2 sc in first sc, sc in next sc) 15 sc) 4) sc in each sc around 5) (sc-dec, sc in next sc) (10 sc) Slp st to next sc FO
Ears (make 2)
Ears are done in a continous spiral Ch 2 1) 4 sc in 2nd chain from hook 2) sc in each sc around Slp st to next sc FO leaving long tail. Sew ears to head as pictured Sew or emboider eyes Stuff head and sew to body
Legs (make 4)
Legs are done in a continous spiral Ch 2 1) 5 sc in 2nd chain from hook 2) In BLO, sc in each sc around 3-4) sc in each sc around Slp st to next sc FO
Stuff beginning tail into the leg for stuffing. Sew legs onto sheep. EWE are done!
Start blogging by creating a new post. You can edit or delete me by clicking under the comments. You can also customize your sidebar by dragging in elements from the top bar.
|